
Continuing from my previous post with the theme of network flexibility that is present in the 7.0.130 VxRail release. This post will look at a new feature that will allow customers to customize their entire vDS configuration. Traditionally all VxRail system VLANs needed to remain on a single vDS. System VLANs are categorized as Management, vMotion, vSan and VxRail Management the latter being used for used for loudmouth/auto-discovery. With 7.0.130 system VLANs can be assigned to dedicated vDS’s. For Example on certain occasions for security purposes, customers might need to isolated MGMT based traffic on one vDS and put vSAN and vMotion on another.
If we take the above scenario we might also want to build in some NIC redundancy to ensure that a single NDC or PCI-E card failure will not result in a node failure scenario. So my overall topology might look something like this.

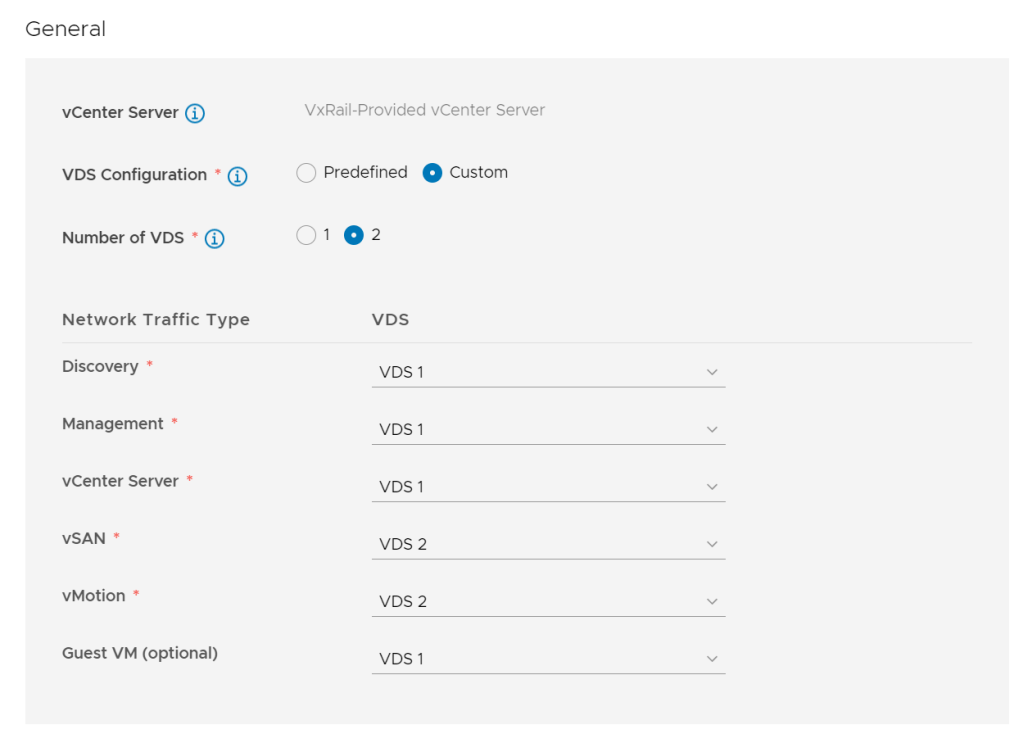
Using the VxRail Config portal – a tool that DellEMC professional services will use to gather the data required to install the cluster we can map out the required vDS configuration using the custom vDS option. With custom selected we can choose to have 1 or 2 VDS. I have chosen 2 vDS and mapped out the system VLANS accordingly, assigning a traffic type to a vDS. Pro Tip Discovery VLAN is VxRail Management.
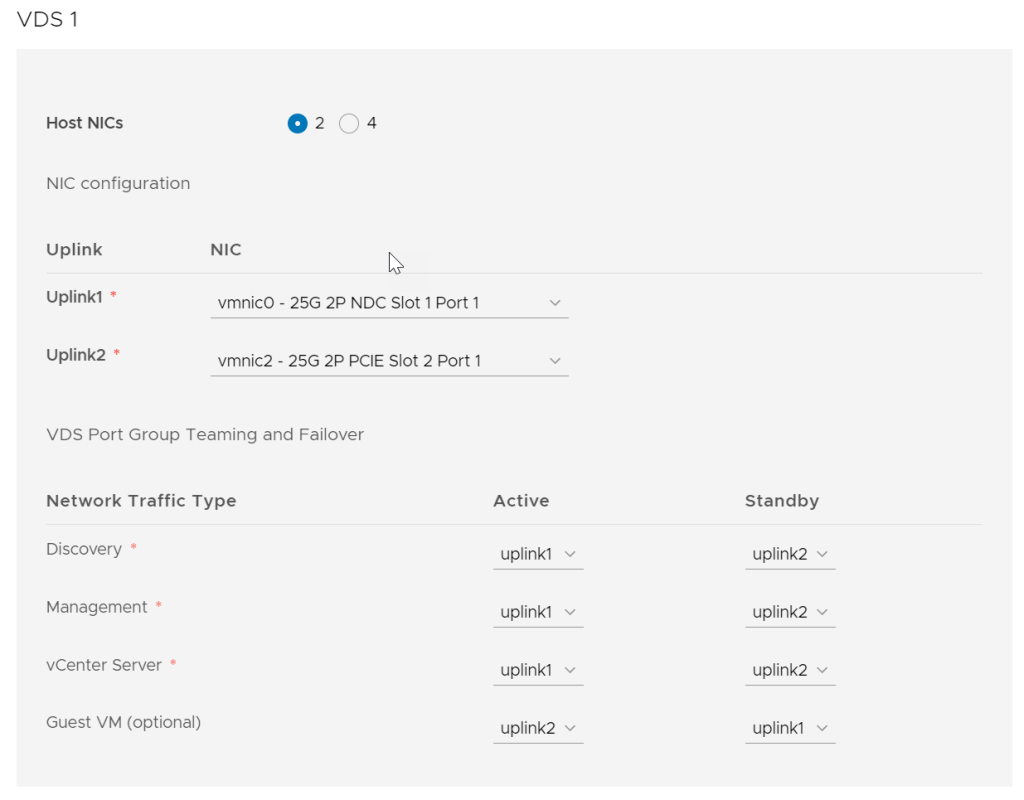
Next, we can define the number of Uplinks assigned to the vDS (2 or 4). Once defined we assign a physical NIC per uplink. In this example, I have selected a physical NIC from the NDC and a physical NIC from the PCI-E card thus giving us physical NIC redundancy. We also define active and standby uplinks for each of the traffic types. Also it worth noting post-build-up we can change to an active/active configuration.
We Repeat the process for the second vDS. This vDS will be used by the vSAN and vMotion Networks. Again we are choosing Uplinks on different cards for additional redundancy.

Once completed we can build a report from the configuration portal that gives us an excellent representation of the configuration. From the configuration portal, we export the .json file with the all pertinent information present.

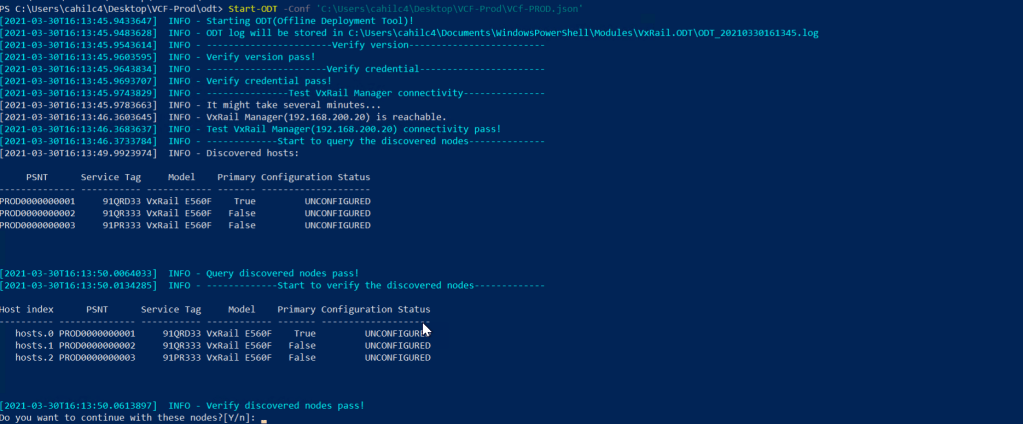
This install option is currently only available via API . So using the API and the .JSON file from the config portal we build the cluster. We need to make sure that VxRail manager is running and is reachable via IP address.
We can monitor the process in the UI also. Just browse to the VxRail Manager IP

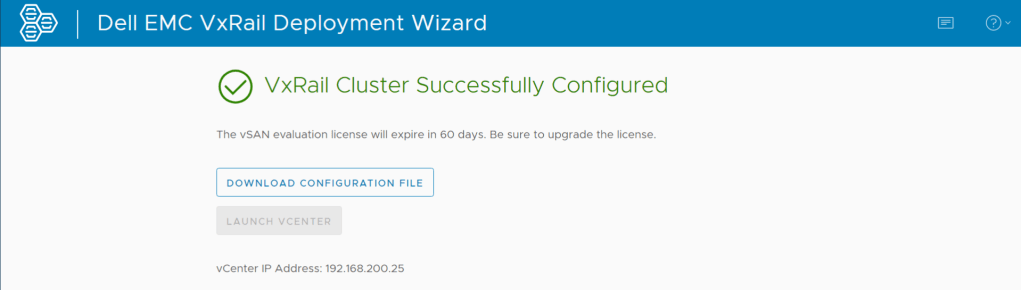
Cluster Successfully Deployed.
Cluster Successfully Deployed via Cli

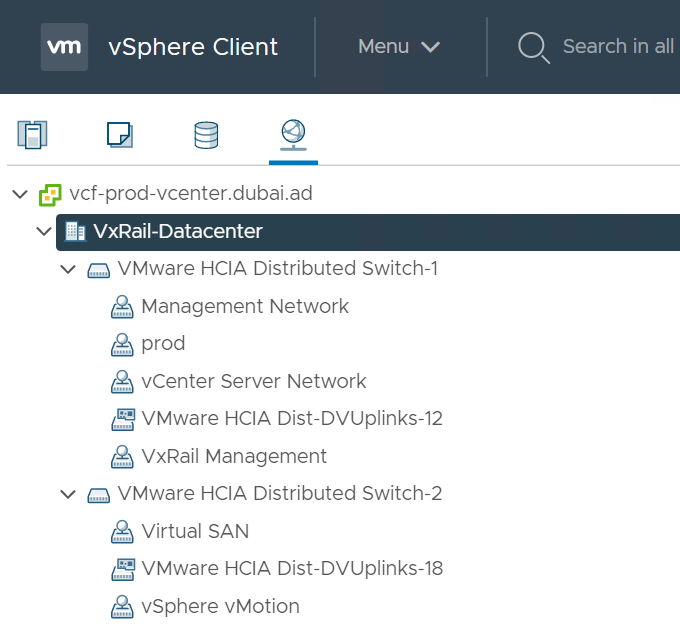
From the vCenter UI we can see the VDS Layout.
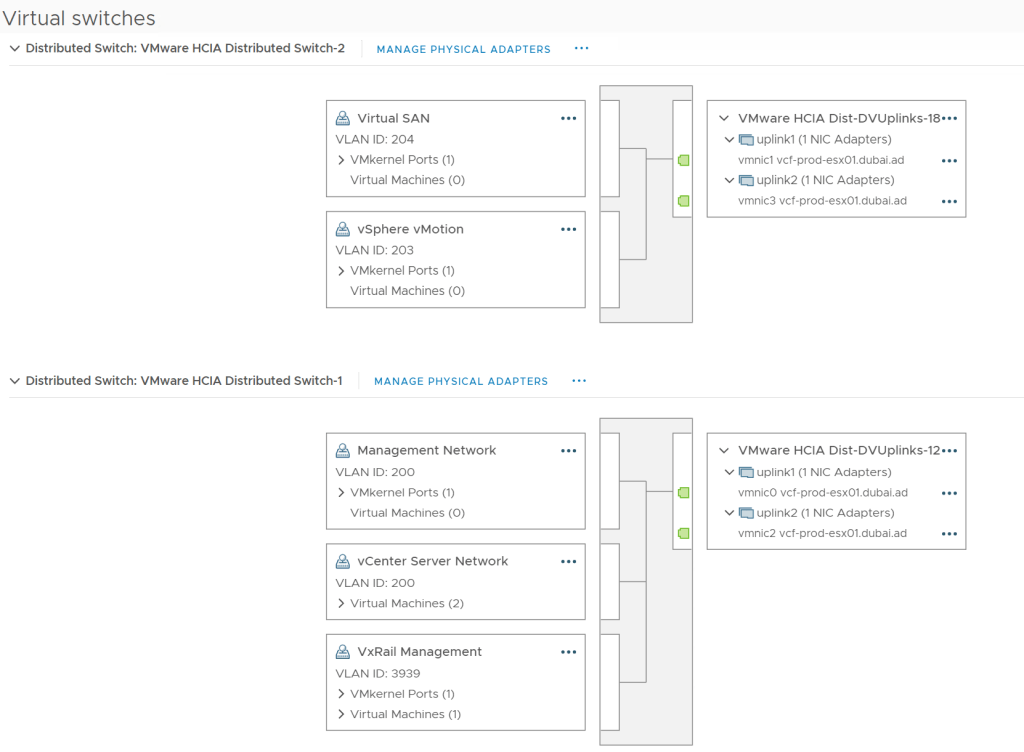
VMKernel adapters

Physical Adapters

Networking View
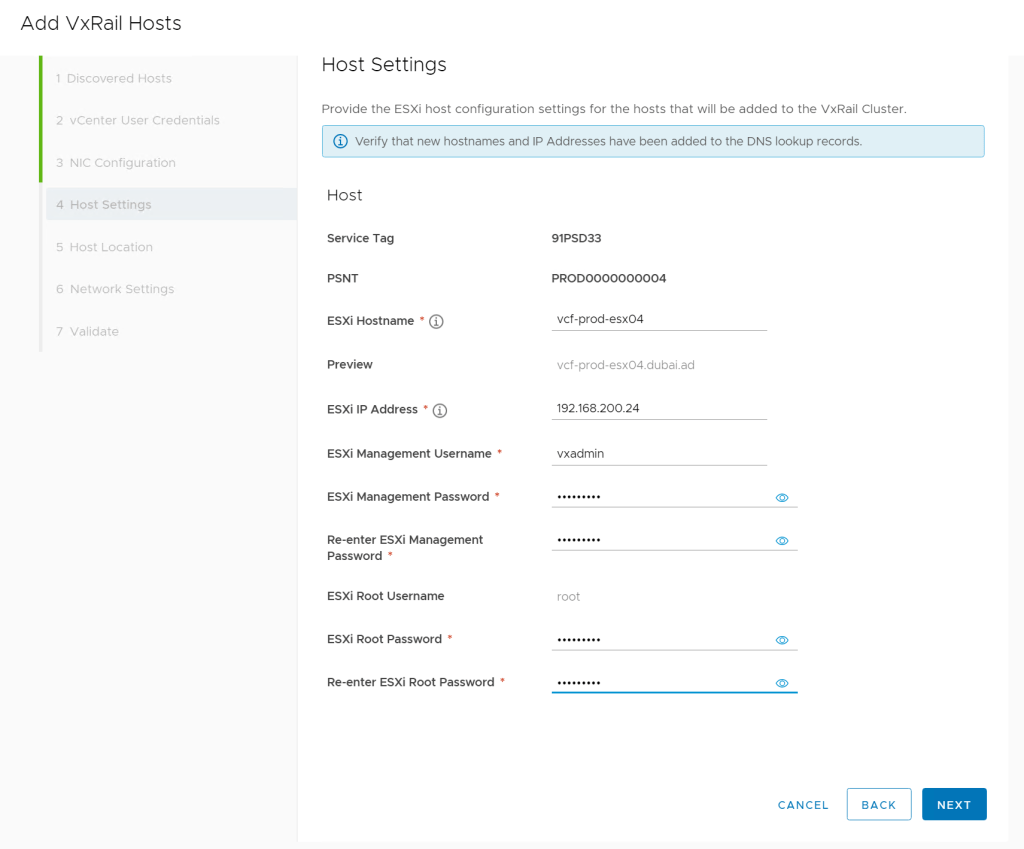
Now we want to expand our cluster. Via the vCenter use the VxRail Plugin to add the new node.

The new node will automatically have the network layout mapped as per the cluster design. Again this gives us a nice overview of the configuration.

Set hostname and credentials.
Set Rack location. ProTip This rack information will be populated in OME if you are using this software part of your operational tool set.

Configure network settings.

Validate

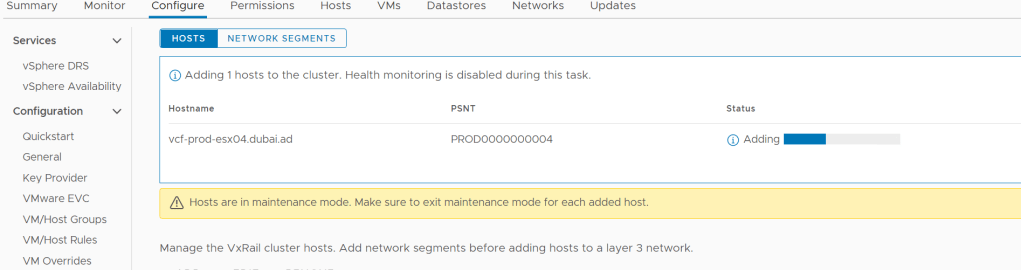
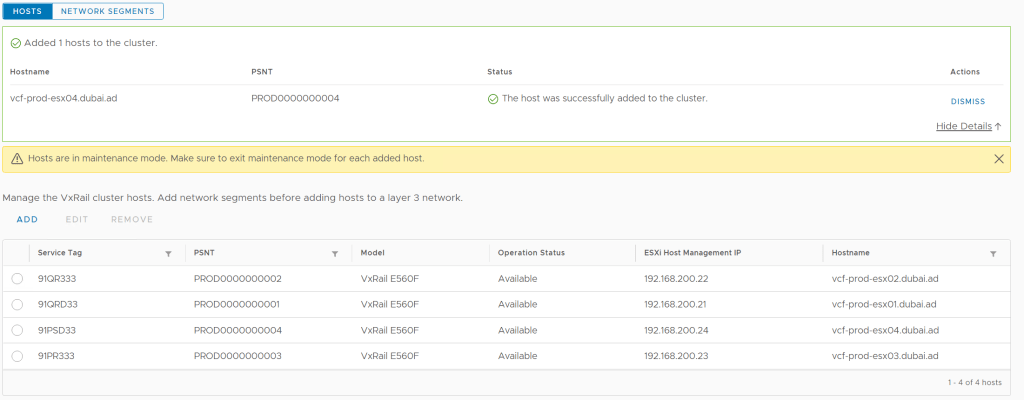
Host adding
Host Added

One thought on “VxRail Multi vDS – System Traffic Separation.”