
One of the tools I use to benchmark our VxRail clusters is HCI Bench. I am going to give a quick overview of how to deploy and configure the product.
You will need
1 – HCI Bench OVA – https://labs.vmware.com/flings/hcibench
2 – VDBench Tool – http://www.oracle.com/technetwork/server-storage/vdbench-downloads-1901681.html – This will require an Oracle account to download
For additional reference I recommend
1 – HCI User Guide – https://download3.vmware.com/software/vmw-tools/hcibench/HCIBench_User_Guide_1.6.5.pdf
Once you have downloaded your hcibench.ova deploy using the vSphere WebClient. I have attempted this in the past with the HTML5 Client but it failed.
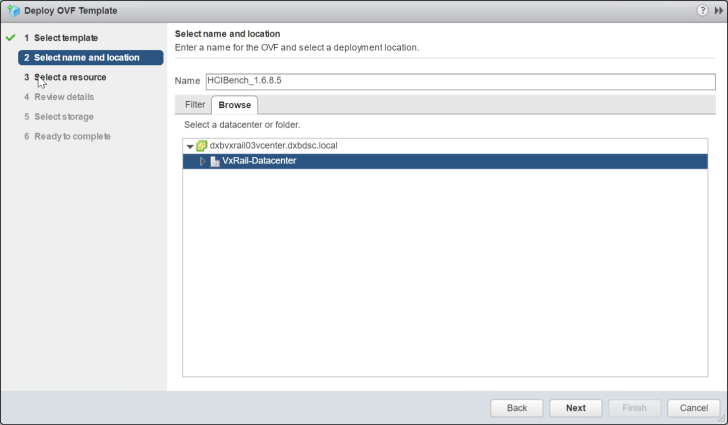
Right Click and Deploy OVF – Select hcibench.ova file, name your VM and select Datacenter when you want to deploy. Click next and then choose which host to run the VM on.
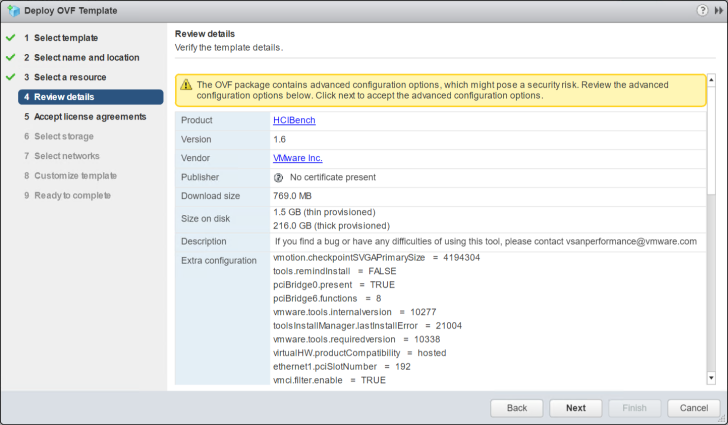
Review the template/ova details and click next.
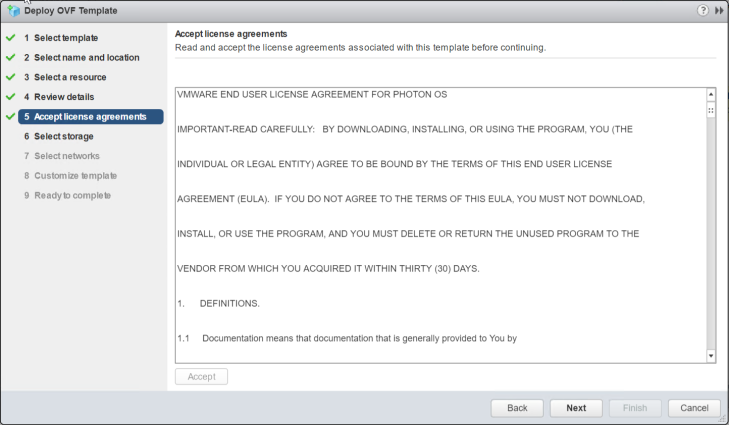
Accept the License agreement to continue. Note there are two separate agreements to be accepted.
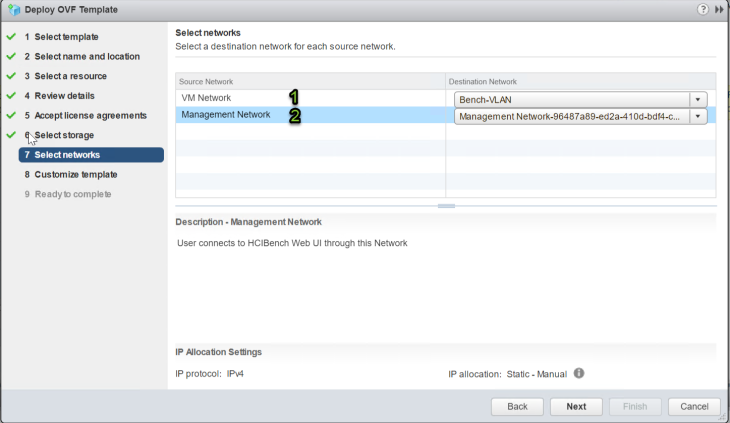
Select which Port group should be associated with each nic.
1 – VM Network – Select the port group where you worker VMs will be deployed – These VM will generate the IOPs/Workload based on a profile that you later provide. This can be an untagged portgoup on your VDS with no gateway required.
2 – Management Network – This is the Portgroup that you will later use to access the HCI Bench UI (User Interface) in order to configure the VM
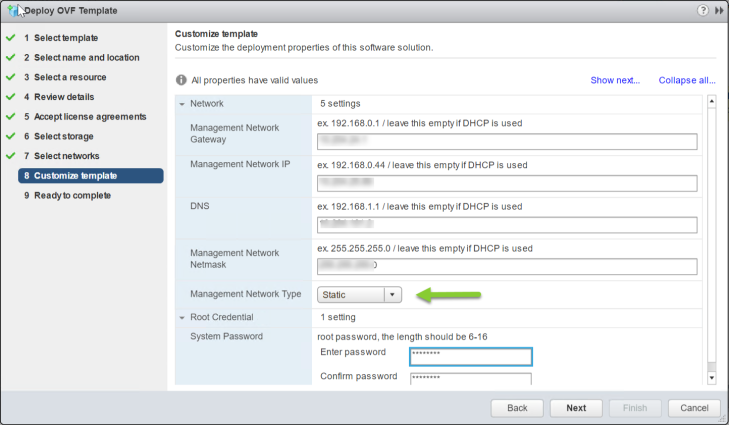
Set the UI IP Information. Make sure your DNS is reachable and working. As part of the validation process, it will check your DNS info. Ensure that your set Management Network Type to Static – otherwise, it will attempt to set an IP address via DHCP
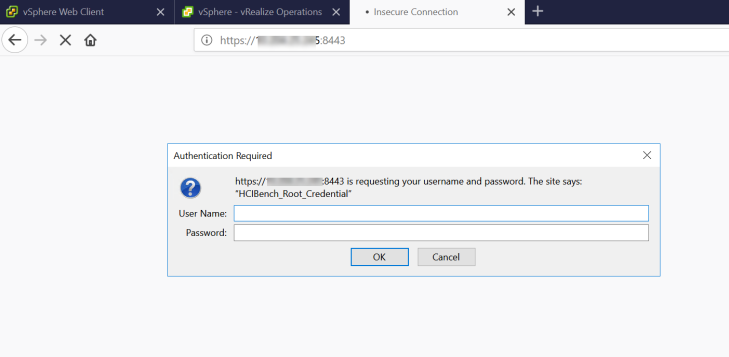
Click next and Finish to start your deployment. Once deployment is is complete connect to your HCI Bench using https://ipaddress:8443
- Username: root
- Password: System Password that you set in the OVA deployment wizard
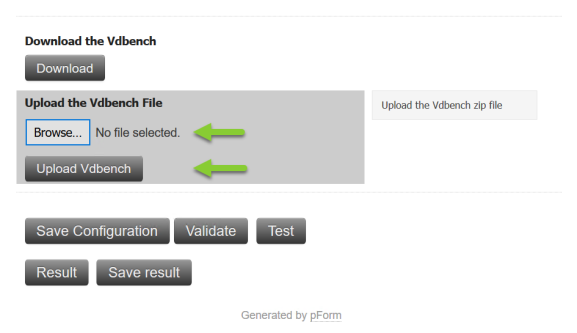
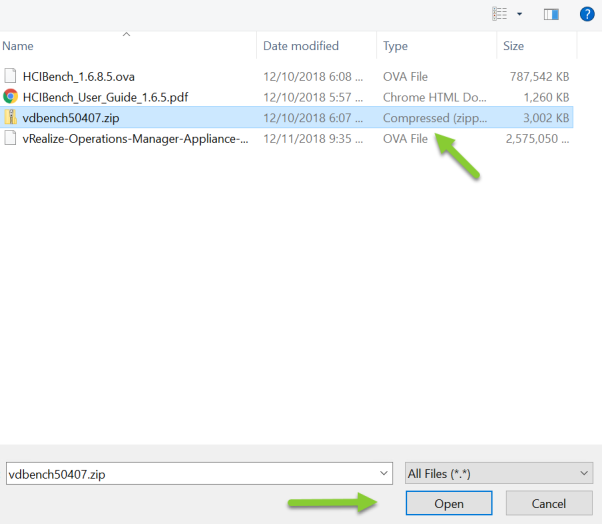
The first step is to upload the VDBench Tool “vdbenchxxxx.zip file”. – For this, you will need to scroll down to the end of the form. Click on Browse
Click on the file and select Open
This Select the Upload VDBench button. (It will only take a few seconds)
Once the upload is complete you will need to fill out the form to allow HCI Bench to connect to vCenter in order to deploy the worker VMS.
The information you will need is from your vCenter instance is.
- vCenter FQDN:
- vCenter Username:
- vCenter Password:
- vCenter Datacenter
- vSAn Cluster Name:
- Port Group (Port Group where the working VMs will be deployed):
- vSan Datastore Name
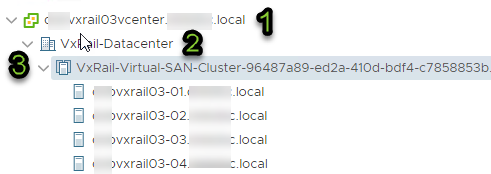
Hosts and Cluster View
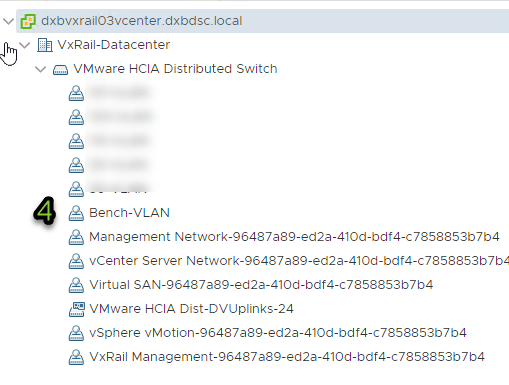
Network View
Storage View

Below is the full HCI Bench configuration page. I have used the numbering scheme as above to help identify where the information gets plugged into the UI.
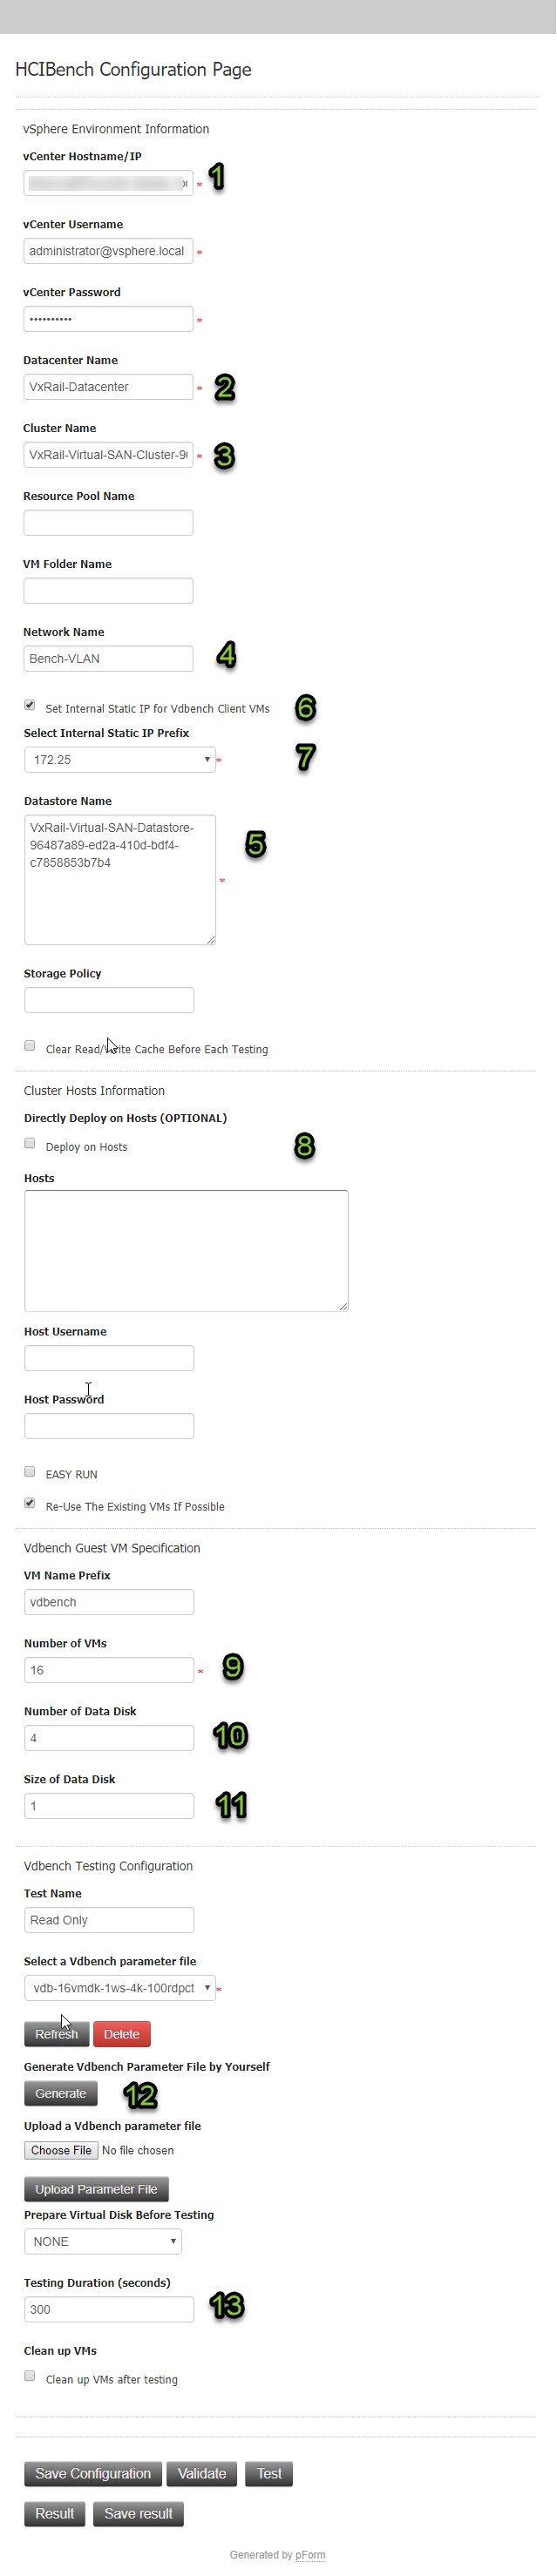
- vCenter Hostname or IP address
- Datacenter name within vCenter
- Cluster Name within your Data Center
- Port Group where your deploy your Worker VMs
- vSan Datastore name where to deploy the worker VMs
- Unless you want to use a DHCP server to assign your worker VMs you should Tick this box.
- It will statically assign an IP address based on this drop down selection. Ensure range does not clash with an existing network to avoid any IP duplicates.0
- Here you can select to target individual hosts if required. If you tick this box you need to give host details.
- Number of Total Worker VMs that will be deployed on the Cluster you have selected
- The number of VMDKs / Data Disks per worker VM.
- The size of each VMDKs / Data disks per worker VM
- Generate Parameter file. I will do a separate post on this at a later date. But know that you need to configure a parameter file prior to saving or validating the information entered. If you create a new parameter file you will need to click the refresh option for that file to show in the drop down. This field is empty for a fresh install of HCI Bench
- The Length of time to run the test in seconds. Note that any value enter here will overwrite any time value that is configured in the parameter file
Save Configuration – You need to make sure to save any changes you make to this form or else the values will not update on the configuration file
Validate – Once you have entered the relevant information you should validate the information prior to running the test. This will ensure all the data has been entered correctly and connectivity between the worker VMs is running smoothly.

The Validation Log can be followed here at this URL:
ipaddress/hcibench_logs/prevalidation/pre-validation.log
Test – Will start the test using the profile and time scale that you set in the options

One thought on “Deploying and Configuring HCI Bench”