
First of all. Let me just say I have an inane fear for certs, creating them, replacing them, requesting them I have always disliked them. So I decided to write this more so for myself so I could have something to reference in future.
Few Notes on my infrastructure. I am running vSphere 6.5 vCenter 9 with a Windows PSC. My Domain Controllers/Certificate Authority are Windows Server 2008R2.
If you are to follow this guide I would suggest reusing the same naming convention as it will make it all the more clear as you proceed through the walkthrough.
Step 1. – Creating a vSphere Certificate Template
Login into your CA Server. Open certtmpl.msc the find the Web Server template. Right click and Duplicate Template.

Select Window Server 2003 Enterprise

Edit the Display name of your new template.

Edit the Properties of the New Template. Select Extensions Tab double-click on the Application Policies and remove Server Authentication.

Select Key usage on the extensions tab and ensure “signature is proof of origin ( nonrepudiation) is ticked.
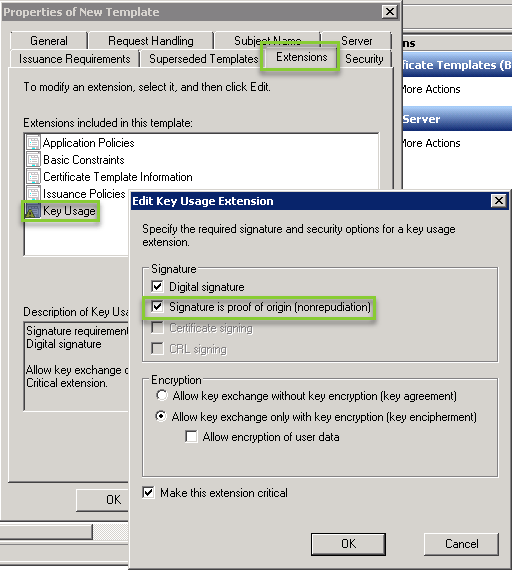
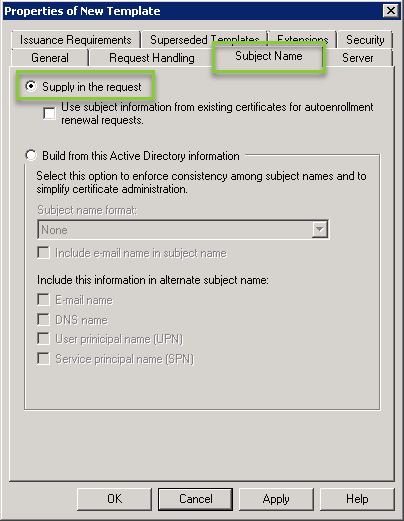
Select the Subject Name tab ensure “Supply in the request” is enabled
Apply your Settings and save your new Template.
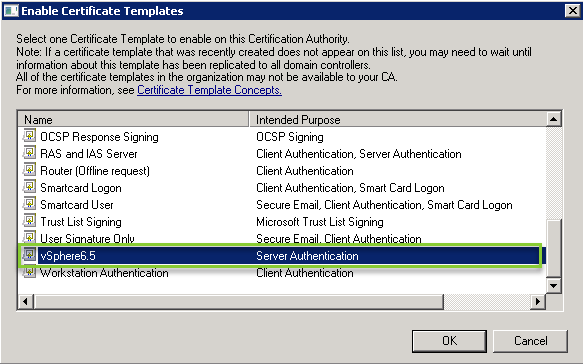
Enable your new certificate. Open certsrv.msc, right-click on Certificate Templates and select New then Certificate Template to Issue.

Select your newly created template and click ok.
Step 2. – Creating .CSR and .Key Files
From your PSC open command prompt and navigate to E:\Program Files\VMware\vCenter Server\vmcad. (Or you equivalent install directory) From here run
certificate-manager

- Select option 1 to Replace SSL Certificates with Custom Certificates, then
- Select option 1 as the second prompt to Generate Certificate Signing Request(s) and Key(s) to replace existing Machine SSL Certificate.
- For the output directory ensure this folder location is created before you answer all these queries as the process will not create it for you and will error out if not present.
- I have highlighted all the details you will require. Note for country Value this can only be 2 characters in length.
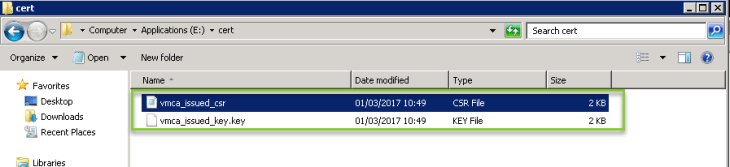
Two Files will be generated.
- vmca_issued_csr.csr – you will use this file during the cert request process on the CA Server.
- vmca_issued_key.key – will be used later when you are importing the new certs.
Step 3. Requesting the new certificates
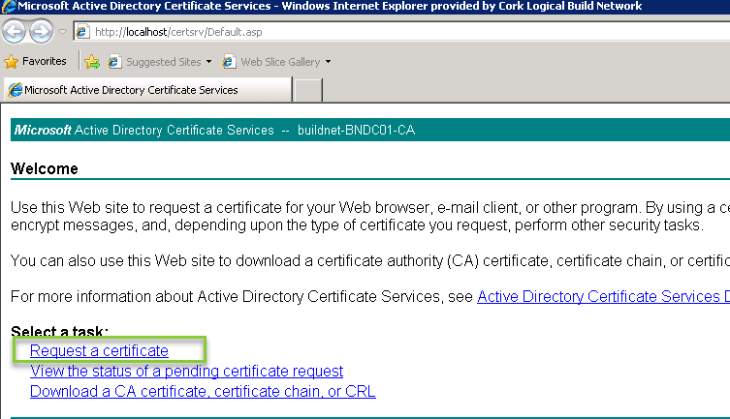
Login to the CA web Server using http://yourcahosname/certsrv/Default.asp and Request a new certificate
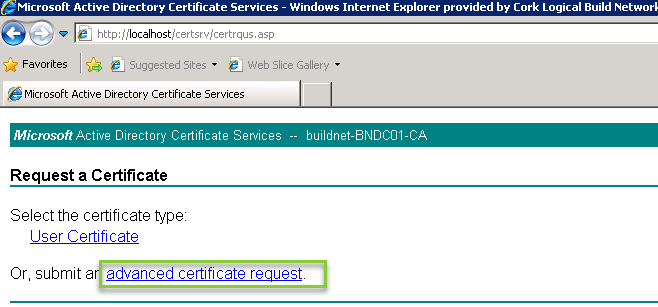
Select Advanced certificate request
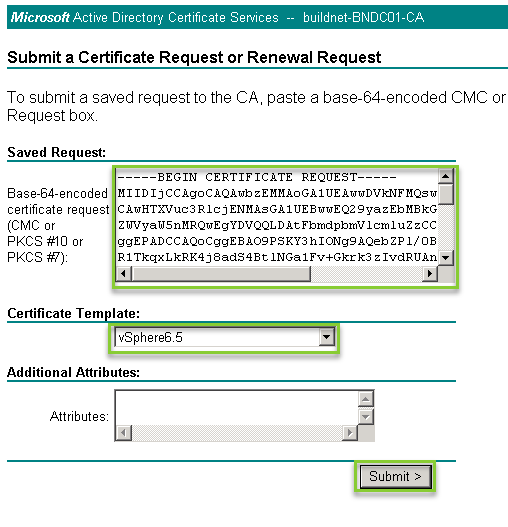
Select Submit a certificate request by using a base-64-encoded CMC or PKCS #10 file, or submit a renewal request by using a base-64-encoded PKCS #7 file.

Open your vmca_issued_csr.csr file in notepad and copy the contents into the Cert request field.

And select the template your created earlier. And Submit
Select Base 64 encoded and Download both certificates.
- Save the Certificate as rui.crt – this will be used later when you are importing the new certs.
- Save the Certificate chain as certnew.p7b

Export the certnew.p7b by double-clicking on the file. this will open in certmgr.msc. Right click on the file. Select all Tasks and Export.

Select Base-64 encoded x.509 (.Cer) and click next

And save the file as Root64.cer – this will be used later when you are importing the new certs.

Step 4. Importing the newly created certs.
Copy
- Root64.cer
- rui.crt
- vmca_issued_key.key
Into a common folder.

If you have previously closed down the command prompt that was running restart the program by opening a command prompt window and navigating to E:\Program Files\VMware\vCenter Server\vmcad. From here run
certificate-manager
- Select option 1 to Replace SSL Certificates with Custom Certificates
- Select option 2 to import custom certificates and keys to replace existing machine SSL certificates

Provide the file locations for the 3 files are shown below. And select Yes to replace the Certs.
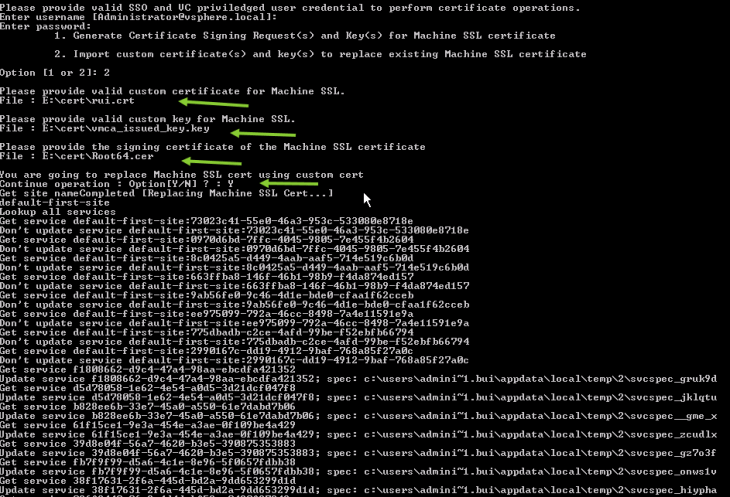
Once the all the operations are completed. you should see Status completed as 100%. Note that this process will restart all the PSC base services to complete the tasks.

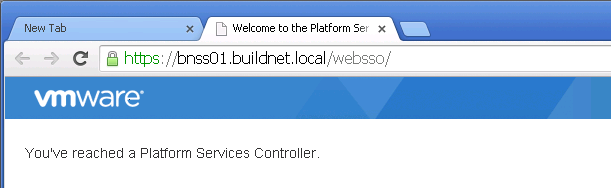
And that little green Icon proves everything works and makes it all worth while. 😀

Thank you very much for the nice review. It was very interesting and informative.
LikeLiked by 1 person